Deposits and Checks Received Entry [How To]
Last Updated on September 14, 2023 by Tatyana Vandich
This ‘HOW TO’ article features the steps to take in order to navigate through a section called Deposits and Checks Received Entry in the Accounting module of erpWizard, Namtek’s fully integrated ERP software solution. This section can be found under Entries and Processing under Accounting/Accounts Receivables (see table below).
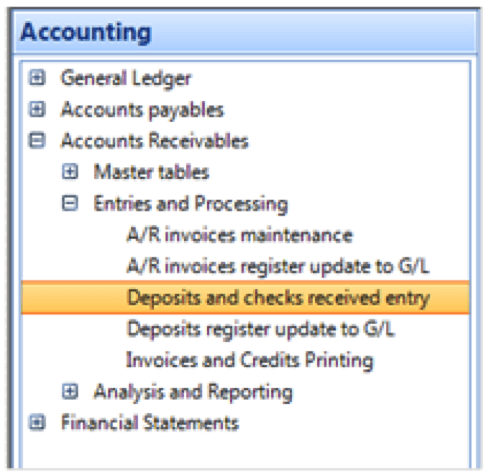
Once you click on the appropriate section, the following screen will appear:
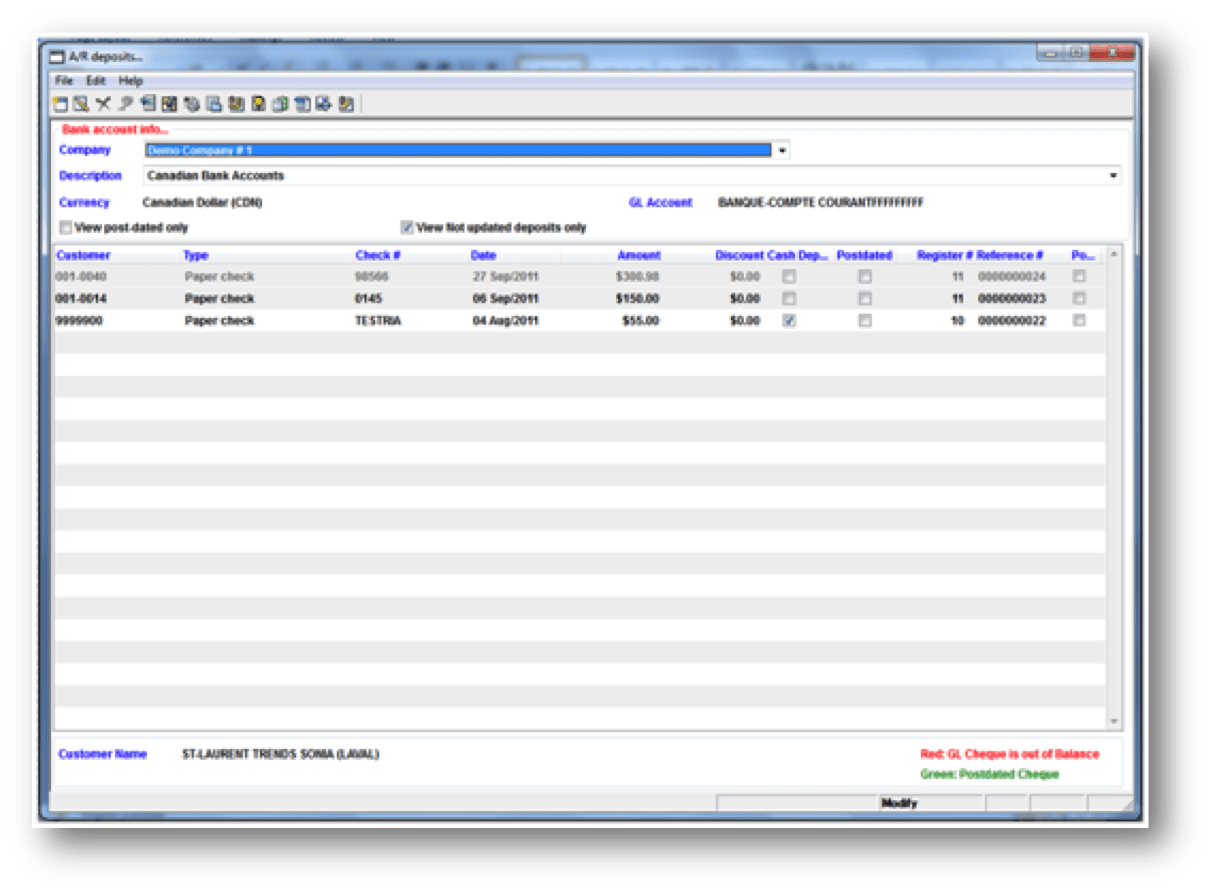
From the above screen, you can view the details of all existing entries and you will have the option to create a new entry or delete one (that has NOT been updated). Other available options include printing the bank deposit slip and other reports.
Checks Received Entry
Right-click and select “New” from the menu. The following screen will appear:
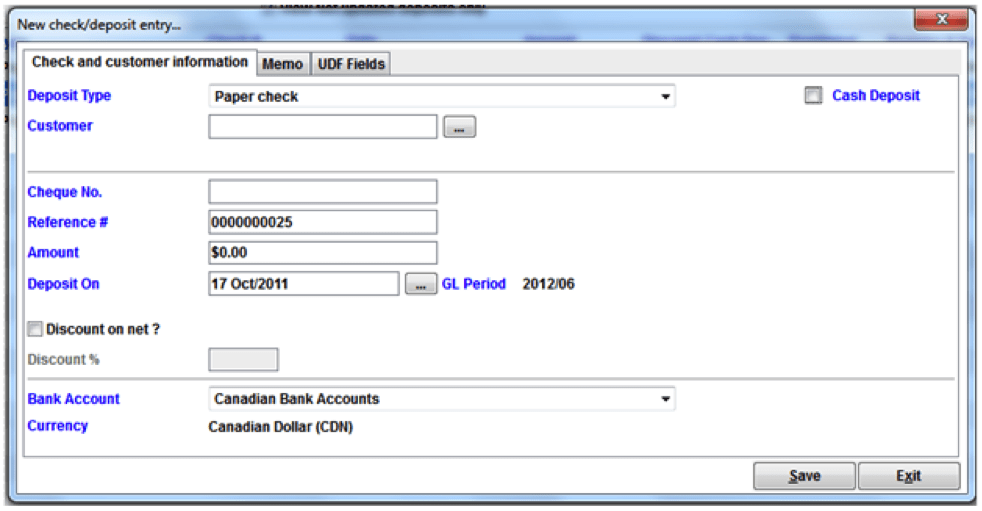
– Select the Deposit Type from the drop-down list. The choices are:
- Paper Check
- Wire Transfer
- Direct Deposit
- NSF
- On Account Payment
- Write OFF
- Claim
- G/L Payment
– If the deposit is in cash, then click the Cash Deposit box. You will still need to choose the Deposit Type.
– Enter the Customer code or click the “…” button to zoom and select the customer from a list of available customers.
– Enter the Cheque No. from the Customer’s check
– The Reference # is for internal information purposes only. The system will suggest a sequence number for you that you can leave as is.
– Enter the Amount of the cheque
– Enter the Deposit On Date. This is the date that you are putting the cheque in your bank account. You may also press the “…” button to zoom to the Calendar and choose the date.
– Select the Bank Account from the drop-down list.
– Click the “Save” button to save the entry and proceed with the tagging of the invoices
Once you have clicked the “Save” button, you will get a message telling you that the cheque was inserted and the following screen will appear:
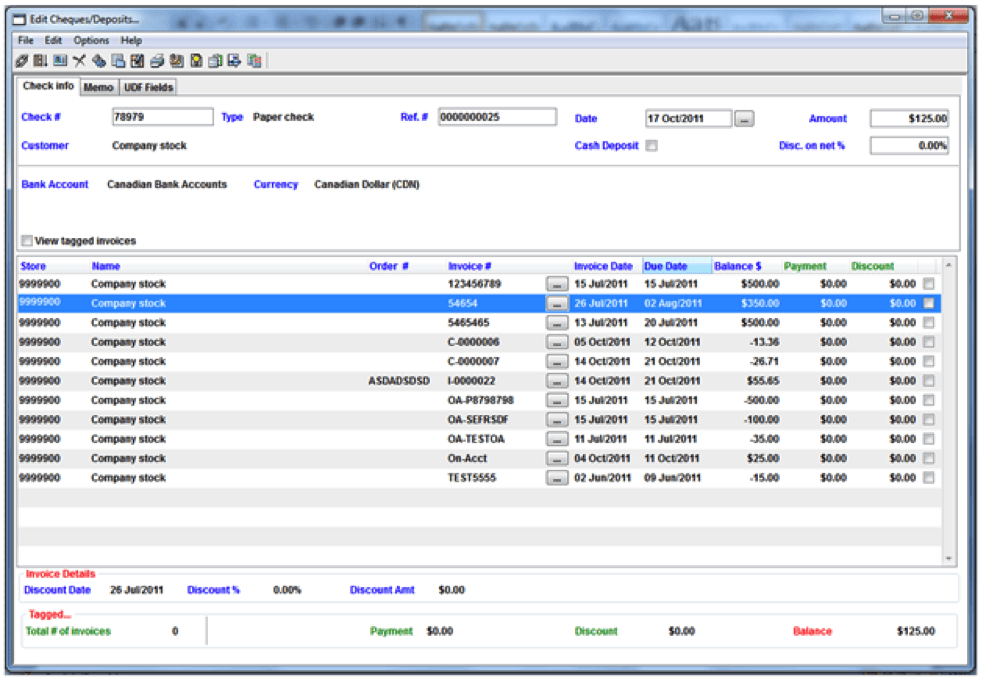
- Select the invoices the customer is paying with the cheque by tagging them. Tag the invoice by selecting it and pressing the “Enter” key or by right clicking and selecting Tag Invoice from the menu.
- Tagging the invoice will automatically set the payment amount. You could also manually enter the Payment amount if the amount being paid is less than the balance amount to be paid.
Once you have completed tagging the invoices, the Balance Amount in the bottom left corner should equal 0$.
Hope this process was simple enough and you are ready to start using erpWizard for your day-to-day tasks. Don’t hesitate to contact our team for more information or to get started.
